
Transform your countertops into the look of luxurious, high-end marble with Stone Coat Countertops. This easy-to-follow tutorial will guide you through the process of creating a beautiful, marble-inspired surface using our unique epoxy formula and high-quality pigments. Whether you're revamping an old countertop or building a new one from scratch, these step-by-step instructions will help you create a durable, professional-grade finish with depth, shine, and elegance. Ready to get started? Follow along with the step-by-guide or video below.
Before you start:
Whether you’re pouring epoxy over an existing countertop—like tile or laminate—or fabricating a new surface from MDF, each approach has unique preparation steps to ensure maximum adhesion. For detailed instructions, check out our specific tutorials. This recipe begins with your surface fully prepped and ready for a stunning epoxy transformation.
Sand and smooth any bumps or rough areas, then clean thoroughly to remove all dust and debris. For new MDF countertops, place them on a level surface and apply two coats of Stone Coat Countertop White Epoxy Undercoat. Allow the second coat to dry for at least 4 hours. This specially formulated, ammonia-free undercoat bonds perfectly with our Countertop Epoxies and substrate materials for the best results (other products may not achieve the same effect). Once the undercoat is dry, lightly sand with 220-grit if needed and clean off any remaining dust.

Prepare the Epoxy:
Ensure the Undercoat is Dry: Before you begin, make sure the undercoat on your countertop is completely dry (minimum 4 hrs. after 2nd coat). This is crucial for proper adhesion and a smooth finish.
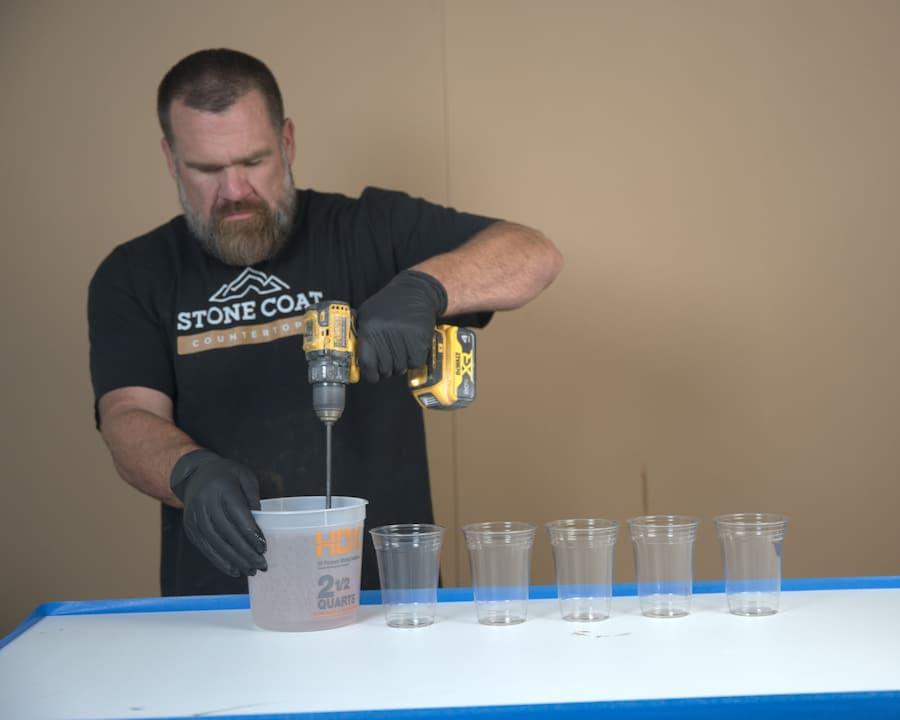
Pour the Epoxy: Calculate the amount of Stone Coat Countertop Epoxy you'll need, typically 4-6 ounces per square foot of countertop surface. Measure equal parts of resin and hardener. Combine them in a clean mixing container. Mix Thoroughly: Stir the epoxy mixture for at least 2–3 minutes with a paddle mixer on a drill. Scrape the sides and bottom of the container to ensure all components are fully integrated. Proper mixing is essential for the epoxy to cure correctly.
Separate for Tinting:
Divide the Mixture: This kit contains multiple colors or effects, pour the mixed epoxy into separate containers. This allows you to customize each batch with different pigments, dyes, or additives.
Add Metallic Pigment Powder:
Measure the Pigment: Add 1–2 tablespoons of Polycolor Metallic Pigment Powder per 16 ounces of epoxy. Adjust the amount based on the color intensity you desire. Incorporate the Pigment: Stir the pigment into the epoxy until it's fully dispersed. Scrape the sides and bottom of the container to prevent unmixed particles, which can affect the appearance and curing.
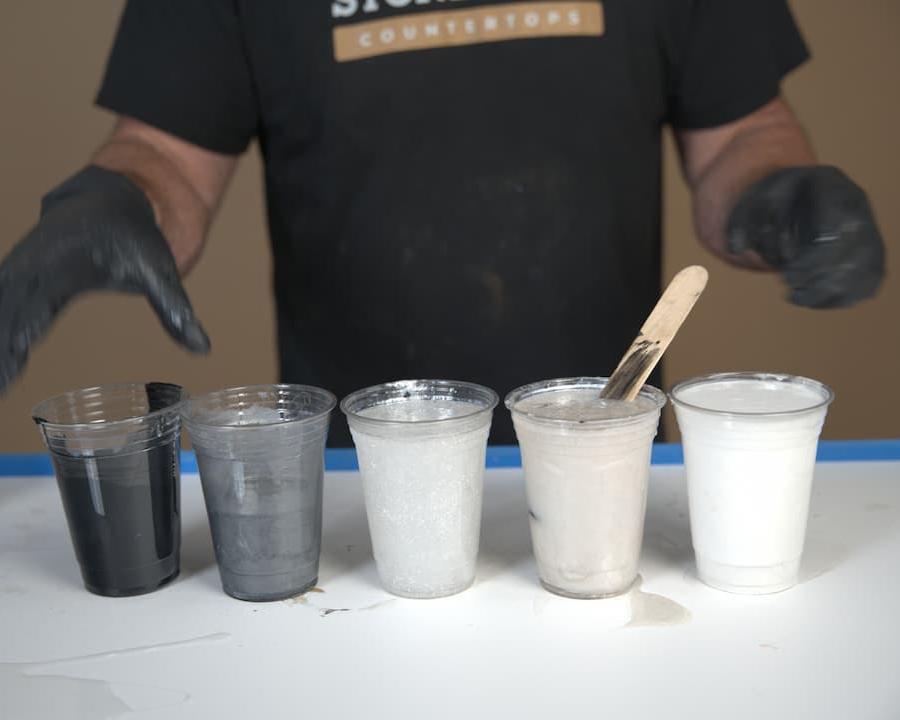
Add Resin Dye Colors:
Using Resin Dye: For a solid, opaque color—especially with lighter shades like white—add 5–10 drops of Stone Coat Countertops Resin Dye per 16 ounces of epoxy. Mix Carefully: Thoroughly blend the dye into the epoxy.
Test the Mixture:
Use the Mixing Stick Test: After mixing, lift the stir stick out of the epoxy and hold it horizontally. As the epoxy levels out to about 1/8", you'll see how the color and additives will appear when applied. Evaluate Opacity and Effect: This test helps you assess whether the epoxy has reached your desired opacity and effect. It's easier to adjust the mixture now than after it's poured. Adjust if Necessary: If the color is too light or not vibrant enough, add small increments of pigment or dye and mix thoroughly before testing again.
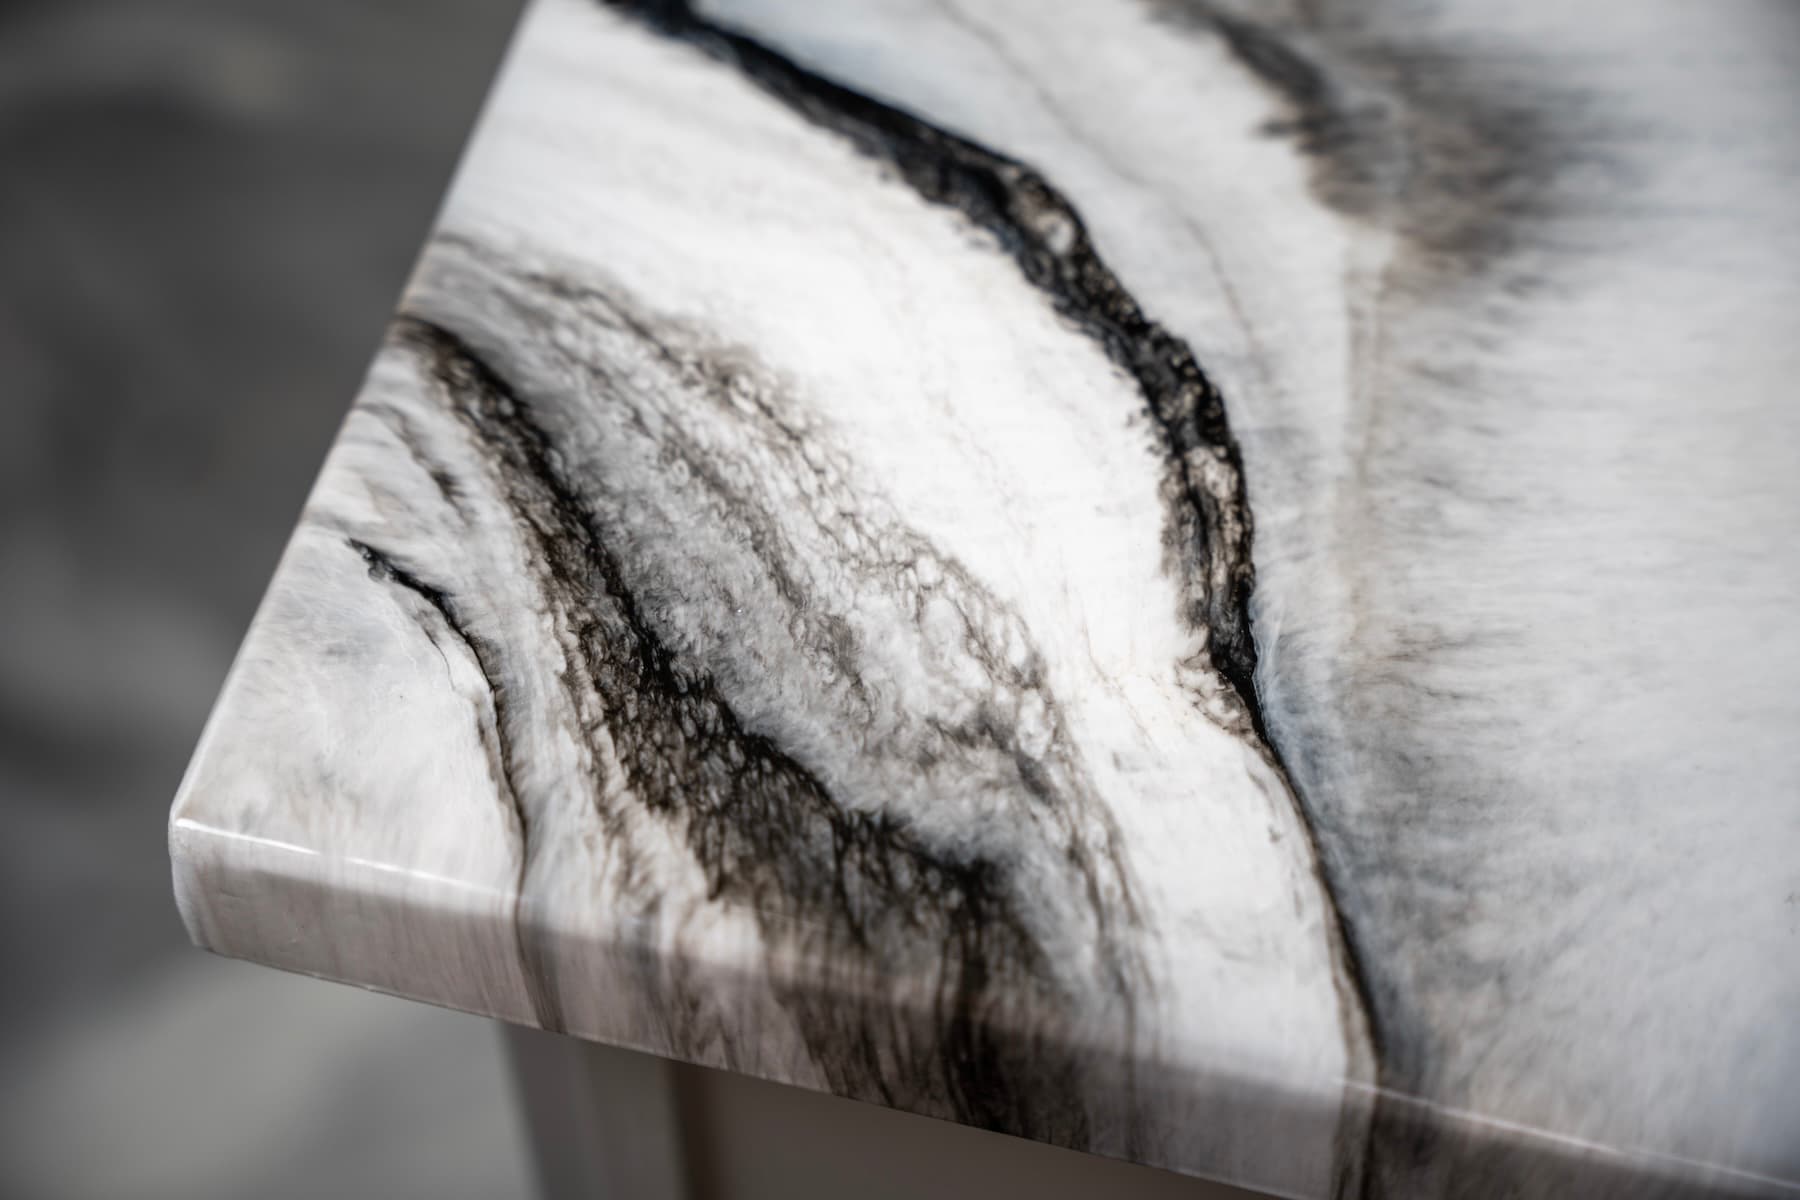
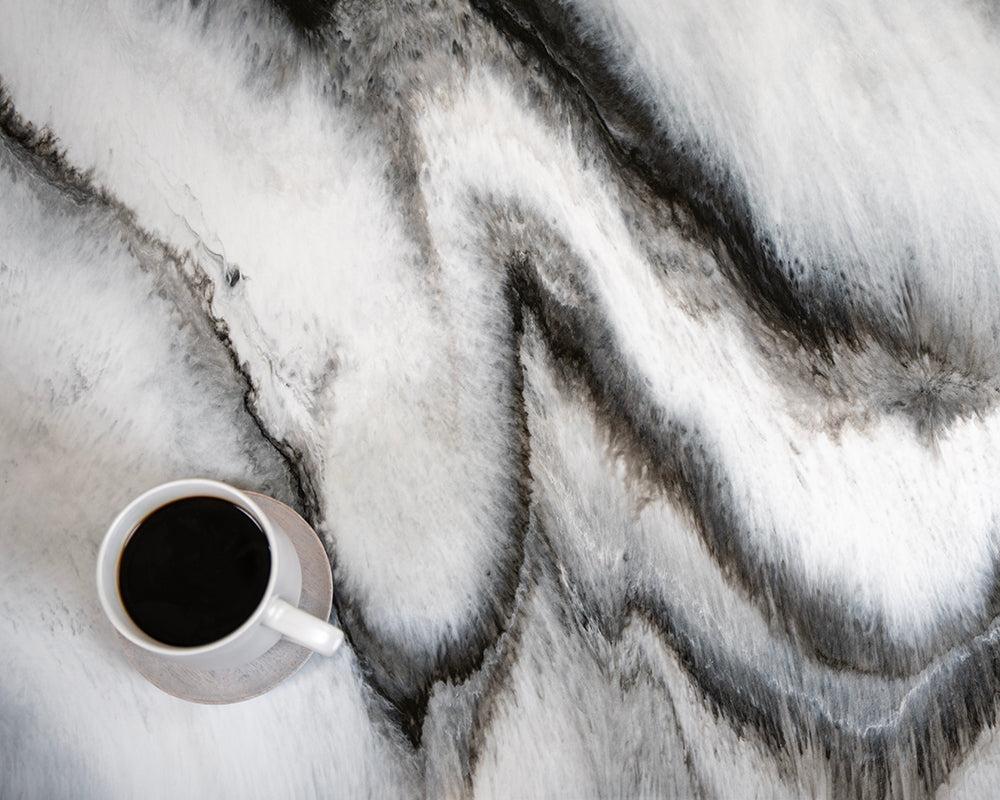
Proper Color Ratio for White Exotic Marble:
Use Minimal Darker Colors: For this epoxy finish, only a small amount of Silver Metallic Powder & Black Resin Dye is needed, a little goes a long way.
Example Mixture for 48 Ounces of Epoxy:

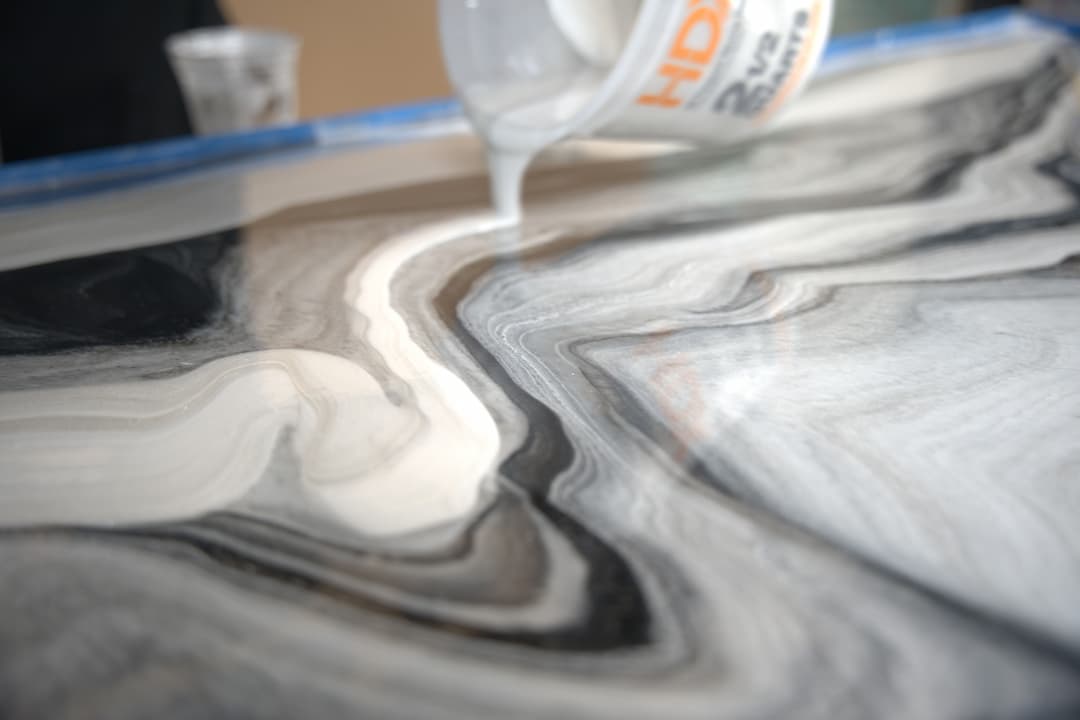
Applying the Base Layer of White & Diamond Dust Epoxy:
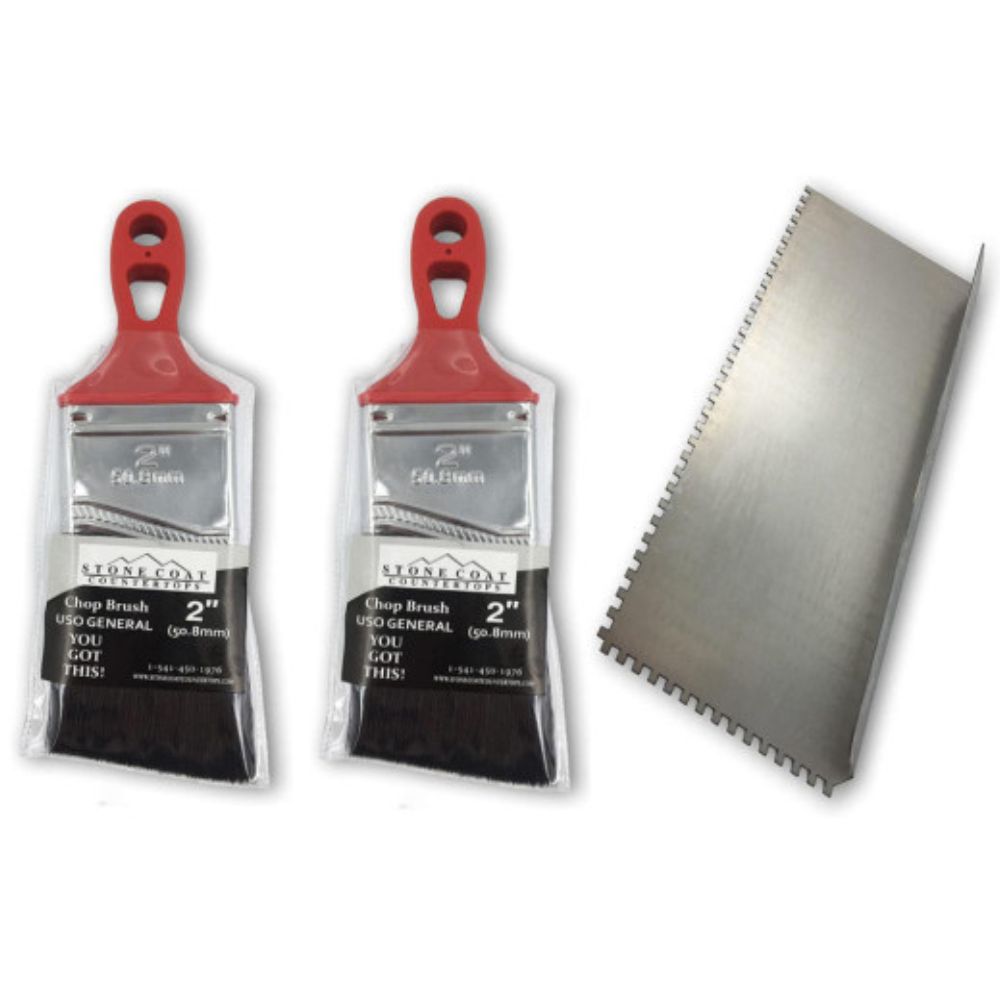
Spread the White Resin Dye Tinted Epoxy: Pour 75% of the white tinted epoxy onto your project. Spread the material over the surface using your gloved hands. Spread the White Metallic Tinted Epoxy: Pour 75% of the white tinted epoxy onto your project. Spread the material over the surface using your gloved hands melding with the white resin dye. Add the Diamond Dust Metallic Epoxy: Pour the Diamond Dust metallic epoxy onto the surface as desired. Meld it into the white tinted epoxies using your gloved fingertips. Use a stick to create small fracture lines with accent colors.
Control the Melding/Blending: You can maintain larger areas of either white metallic, white dye, or any epoxy color based on your preference. The more you meld the colors, the more they blend into a single hue.
Add in Black Resin Dye & Silver Accent Epoxy:
Use Sparingly: A little black & silver epoxy goes a long way. Add a small vein of black metallic epoxy onto the surface. Meld with White Epoxy Base: Use your gloved fingertips to meld the black & silver metallic into the white epoxy, blending it gently with the surrounding white. Create Subtle Marbling: Run your fingertips through the black vein and then swipe them across the white base epoxy to add subtle black marbling. Continue this technique until you achieve the desired look. Adjust If Too Dark: If areas become too dark, use some of the leftover white dye or white metallic epoxy as an eraser. Pour ribbons of the white epoxy over the dark spots and lightly meld them with your gloved hands to lighten the area.

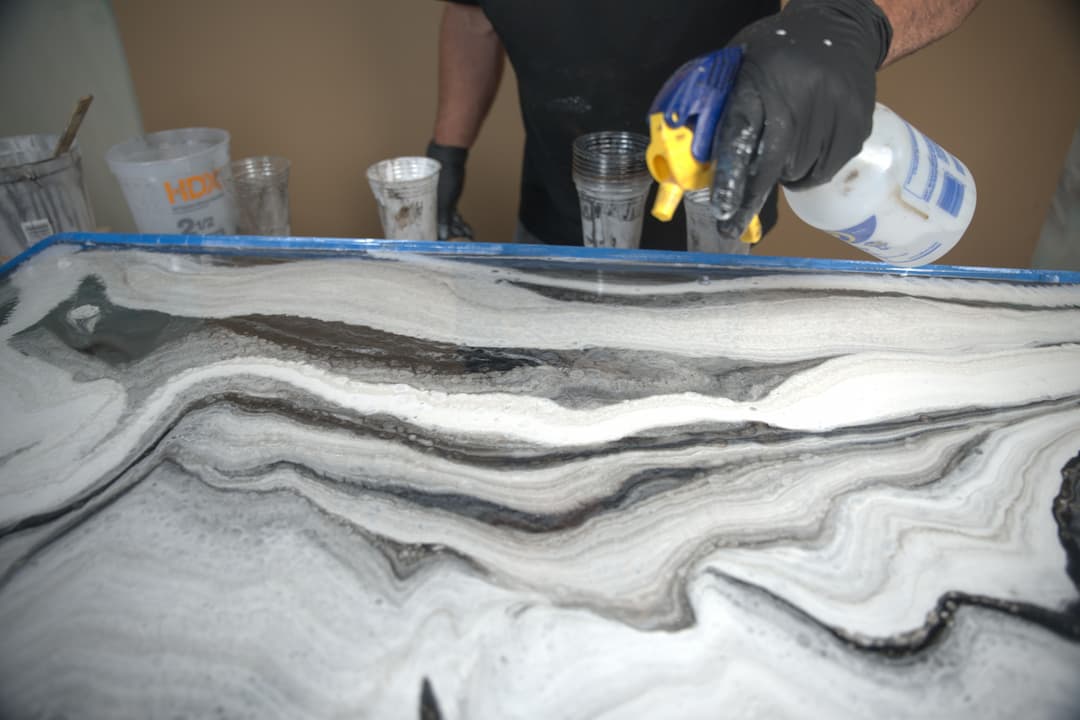
Add Celling & Lacing to the Epoxy:
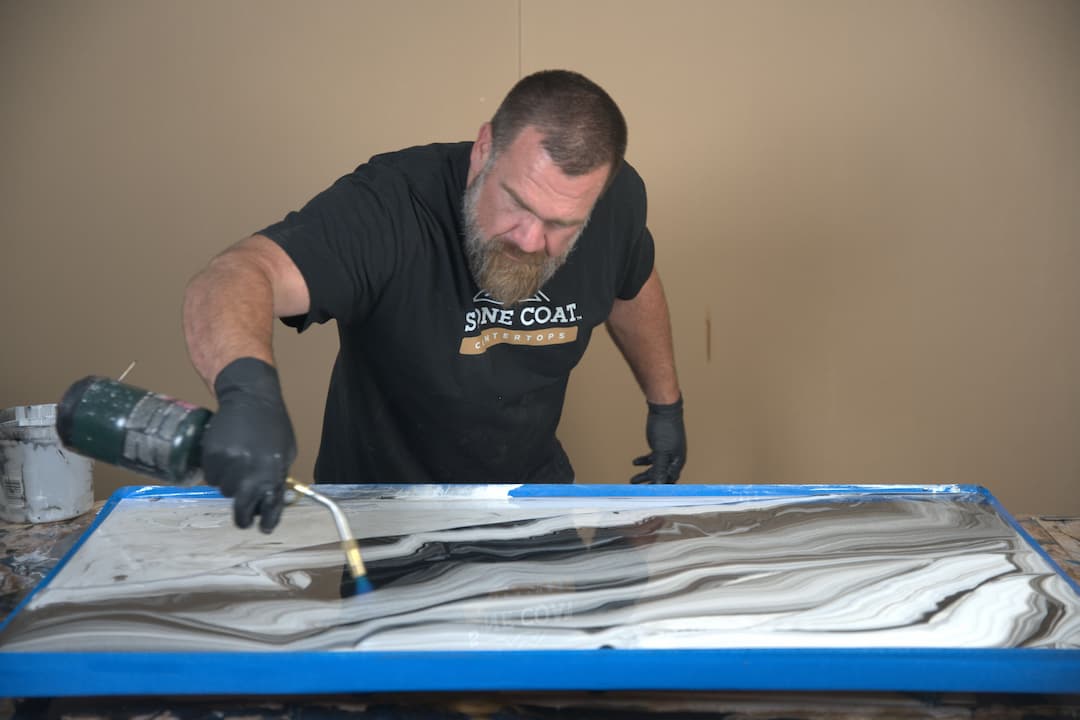
Use 91% Isopropyl Alcohol in a spray bottle to add realistic celling and fracturing of the epoxy finish. Apply different sized droplets for a stunning look. Allow the alcohol to evaporate before applying a second layer of Isopropyl.
Let it Cure:
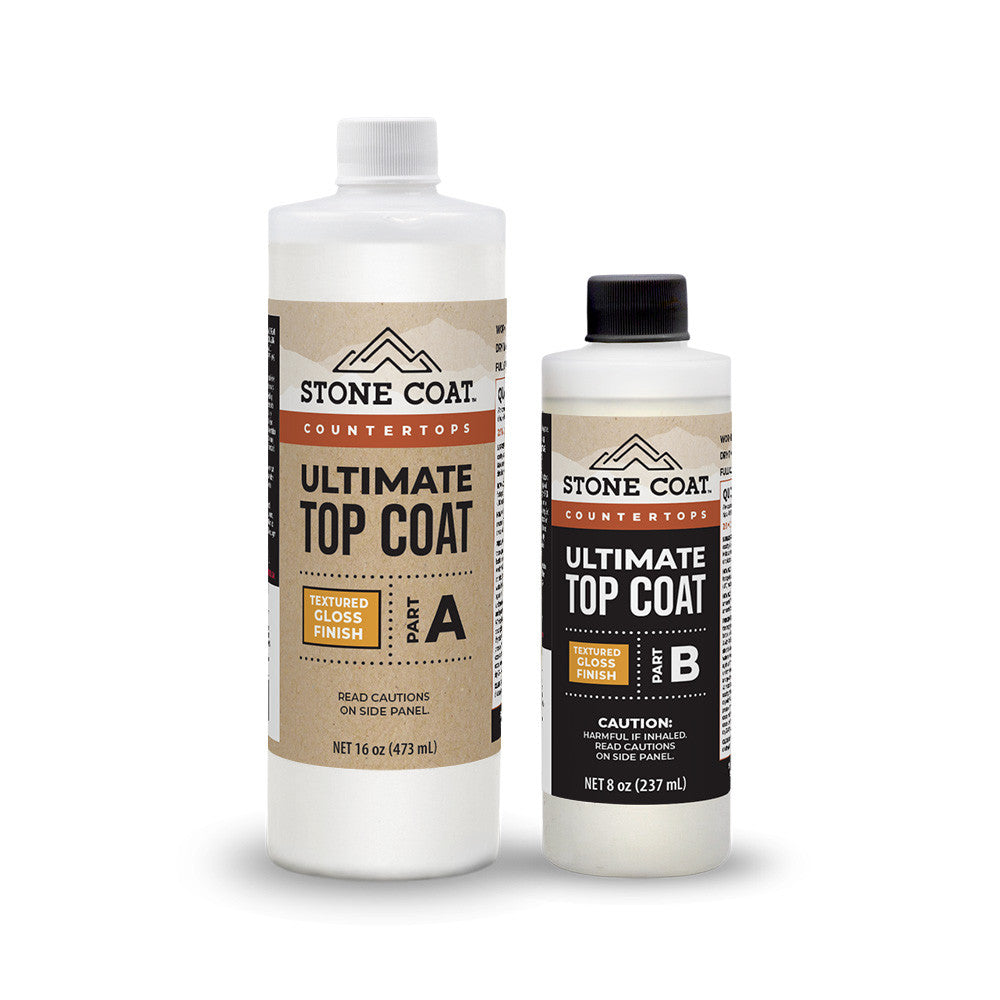
Finish and protect your design with a clear flood coat of Stone Coat Countertops Art Coat Epoxy. When using the White Exotic Marble Kit, you will not have enough leftover Art Coat Epoxy for the clear coat at 3 oz per square foot. So, make sure to pick up some additional bottles Art Coat Epoxy if you want a smooth, high-gloss finish on your countertops!
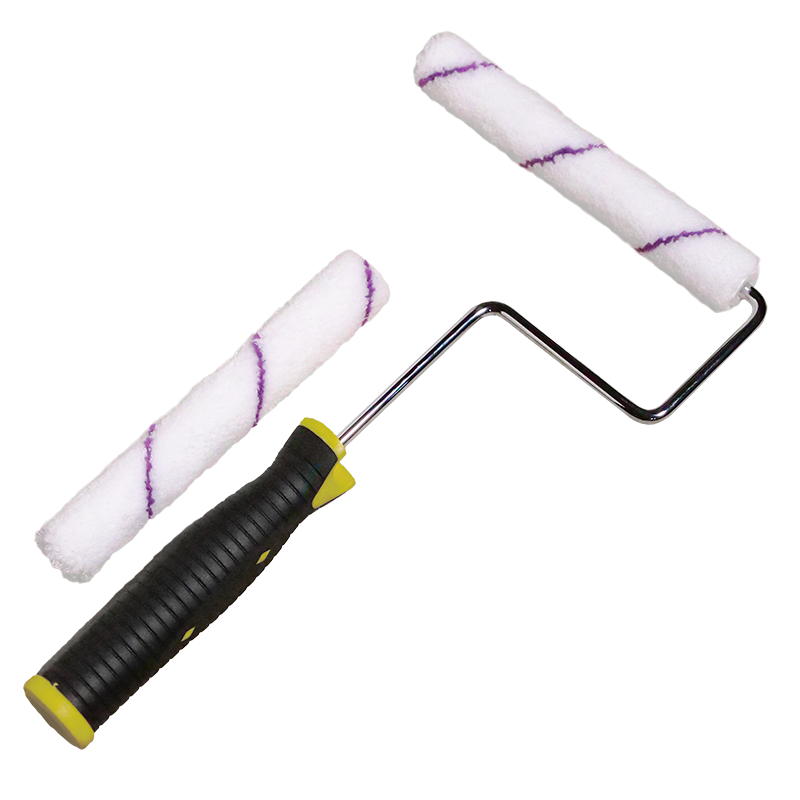
1. Mix Clear Epoxy: Follow the instructions to mix the clear Stone Coat Countertop Epoxy thoroughly using a drill with a paddle mixer.
2. Pour the Epoxy: Pour the mixed epoxy into the center of your countertop in a large ribbon.
3. Evenly Spread the Epoxy & Remove Air Bubbles:
For maximum durability, we recommend coming back overtop the clear coat of epoxy once cured with a scratch-resistant protective layer of our Ultimate Top Coat. The Ultimate Top Coat will need to be purchased separately to achieve our highest performing finish.
Remove Air Bubbles:
Ensure even coverage over edges, and scrape drips from the bottom using a gloved hand or paint stick. Pass a propane torch 2’’ from the surface to eliminate bubbles, allowing 2-3 minutes of cooling between at least three passes.
For highly-detailed written instructions, see our Ultimate Top Coat Instructions HERE.
Optional Design Steps:
Enjoy your new countertops!
From all of us here at Stone Coat Countertops,
You Got This!

Follow the tutorial below that applies to your project: