

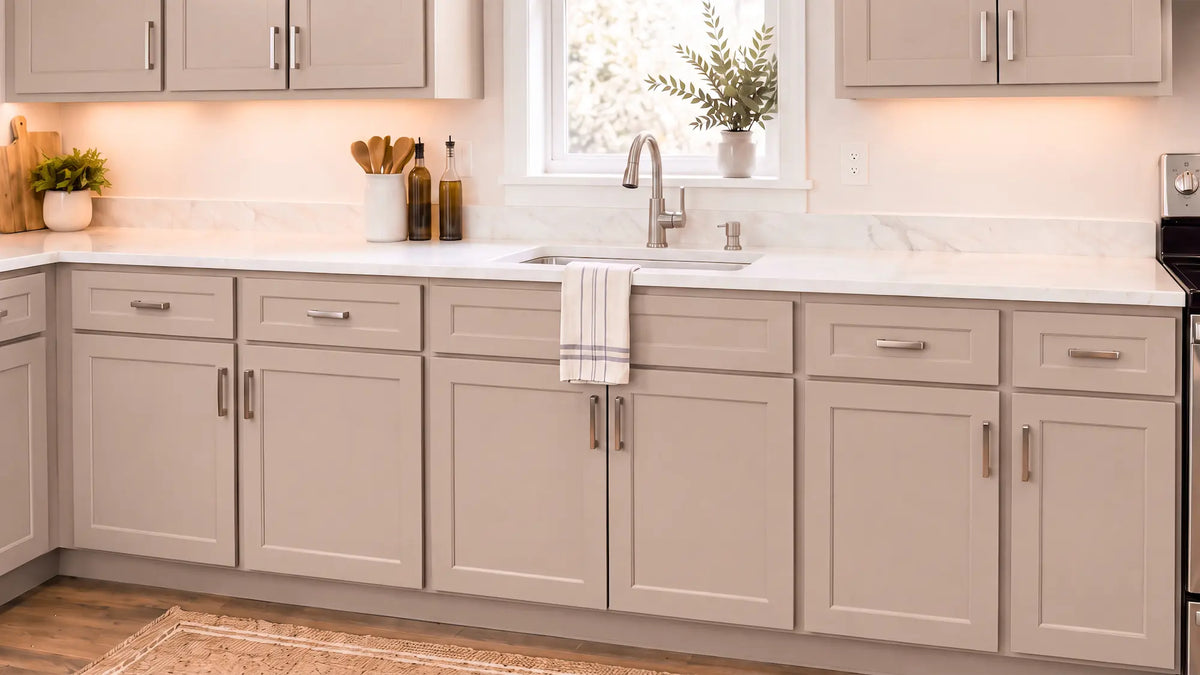
Walk into a kitchen, and you immediately understand how the home feels - not because of the layout, but because of the surfaces.
Countertops, cabinets, islands, and finishes shape the entire perception of the space. They determine whether a kitchen feels dated or elevated, neglected or intentionally designed.
If you don’t like what you see, you don’t need a full renovation to completely change that experience. With the right surface upgrades and systems designed specifically for DIYers, you can transform your kitchen in a single weekend.
This guide focuses on the highest-impact areas: countertops, cabinets, islands and bar tops, and, for the right homes, even kitchen floors, all to create seamless, high-end finishes without the cost and disruption of a traditional remodel.
What Are the Best DIY Kitchen Upgrades?
If you want the biggest visual impact without a full renovation, focus on the surfaces people notice first and use most:
- Countertops (the focal point)
- Cabinets (the largest visual footprint)
- Islands and bar tops (the centerpiece)
- Floors (for specific layouts and styles)
Epoxy, polyaspartic countertop coating, and paint systems are designed to transform these surfaces without demolition, turning what you already have into something that looks custom-built.
Cost-Effective Ways to DIY Your Kitchen Countertop Upgrade
Replacing countertops is often one of the most expensive parts of a kitchen remodel. But what actually defines the look of the space isn’t the structure underneath, it’s the surface itself.
You can refinish your existing countertops into seamless, stone-like finishes without tearing anything out. Epoxy and Polyaspartic can be poured directly over the most common counter surfaces, such as:
No demolition.
No contractor schedules.
No huge price tag.
Just a dramatic surface transformation that completely changes how the kitchen looks and feels.
Countertops That Look Like Marble, Granite, or Quartz

Rich marble veining. Deep stone tones. A seamless, high-gloss finish that completely changes how a kitchen feels.
Stone Coat Epoxy Countertop Kits create these high-end looks directly over your existing surfaces, without demolition or countertop replacement. Replicate sought-after stone finishes like Carrara Marble, Black Marble, White Exotic Marble, Natural Earth Tones, Soapstone, Caramel Marble, and White Quartz, without requiring complicated custom mixing.
Epoxy isn’t the only option for resurfacing existing kitchen countertops. A polyaspartic coating, like APEX Polyaspartic Countertop Coating, is non-yellowing and designed specifically for white and light countertop transformations.
Each finish creates its own distinct feel in the space, resulting in a surface that looks custom-built and high-end at a fraction of the cost of natural stone.
That flexibility also makes it ideal for more than just perimeter countertops. The same systems can be used to transform kitchen islands, breakfast bars, coffee bars, and butcher block workspaces into cohesive statement pieces that tie the entire kitchen together.
But this upgrade isn’t just about appearance; it’s built for real-life kitchen use.
Kitchen countertops take more daily abuse than almost any other surface in the home, which is why Stone Coat products are designed to be:
- FDA-compliant for food contact
- Heat resistant
- Scratch resistant
- Impact resistant
This is often the first upgrade people notice when they walk into a kitchen. When the countertops look intentional, updated, and well-maintained, the entire space feels transformed.
Make It Your Own: Custom Countertop Finishes

If you're looking for something that can't be found in a slab yard or big box store, epoxy and polyaspartic countertop coatings open the door to virtually unlimited design possibilities.
Starting with a clear base, you can create anything from subtle natural stone looks to bold statement pieces using Metallic Powder Pigments, Gel Tint, Liquid Colorants, Glitter Additives, Pigment Paste, and veining techniques. Create a deep sapphire and gold design with sapphire Blue and gold metallic powder, a dramatic charcoal surface with silver highlights, a soft white marble accented with pearl shimmer, or warm copper and bronze tones that complement natural wood cabinetry.
This is where creativity takes over.
Instead of choosing a countertop color from a limited selection, you're designing a surface tailored specifically to your space. Every movement, vein, highlight, and accent is unique to your project, resulting in a finish that feels custom from the moment it's poured.
And because it uses the same countertop system that powers the marble and stone kits, you're not sacrificing performance for creativity. You get the same durable, heat-resistant, scratch-resistant surface while gaining the freedom to create something that is entirely your own.
Update Your Kitchen Cabinets Without Replacing Them

Few upgrades change a kitchen faster than updating the cabinets.
Dark, dated, or worn cabinets can make the entire room feel tired. A fresh, smooth finish can instantly make the space feel brighter, cleaner, and more intentional.
And because cabinets cover more surface area than almost anything else in the kitchen, their color and finish have an outsized impact on how the room looks and feels.
That's why choosing the right paint matters.
Cabinet Paint That Holds Up Like a Factory Finish
A great cabinet makeover isn't just about color. It's about achieving a smooth, durable finish that looks intentional, professional, and built to last.
Cabinet and Furniture Paint from Stone Coat is specifically formulated for high-traffic surfaces, helping resist chipping, scratching, and moisture in an environment where standard paint often struggles. From daily use to constant contact around doors, drawers, and handles, it's designed to hold up where kitchen cabinets need it most.
Unlike standard paint, it's formulated for the surfaces that take daily abuse from hands, cookware, cleaning products, moisture, and constant use.
The result is a smooth, uniform finish that helps cabinets look refreshed rather than repainted. Doors and drawer fronts maintain a clean appearance without the brush marks, soft finish, or premature wear that can make a DIY paint job stand out for the wrong reasons. It's designed to hold up to kitchen humidity, grease splatter, and the repeated opening and closing that happens every day in a busy home.
Transform Your Kitchen Island or Bar Top

Kitchen islands and bar tops are often the most-used and most-noticed surfaces in the room. They're where meals are prepared, conversations happen, and guests naturally gather.
Because islands and bar tops draw so much attention, even a single surface upgrade can transform the feel of the entire kitchen.
Stone Coat Countertop Kits allow you to create everything from flowing marble veining across a large island to rich soapstone finishes on a breakfast bar or metallic designs that become instant conversation pieces.
The result is a seamless, custom look that feels intentionally designed and often becomes the first thing people notice when they walk into the room.
Epoxy Islands and Bar Tops That Stop People Mid-Sentence
Picture a large kitchen island topped with a Carrara Marble finish. Soft veining flows across the surface, catching the light from overhead fixtures, while the cabinet base below is finished with cabinet and furniture paint. Together, the two surfaces create a centerpiece that looks custom-built and showroom-worthy.
That's the power of treating the island as a complete design feature, not just a countertop.
The transformation becomes even more dramatic when both the top and base work together. A fresh cabinet finish paired with a stone-inspired surface can completely change how the kitchen feels without changing the layout.
For homeowners who love the look of wood, a butcher block island sealed with Stone Coat Countertop Epoxy creates a food-safe, waterproof surface while allowing the natural grain to remain visible underneath.
Bar tops benefit from the same approach. Polyaspartic and epoxy coatings create a seamless, glass-smooth finish that stands up to drinks, heat, food prep, and daily use. It's FDA-approved for food contact and designed for the surfaces that naturally attract the most attention.
The secret isn't just the countertop. And it isn't just the paint.
It's the combination that transforms an island or bar top from functional to unforgettable.
Epoxy Kitchen Floors

Epoxy kitchen floors aren't for every home. But for the right space, they're one of the most dramatic and durable upgrades you can make.
Imagine a seamless floor that flows from the kitchen into the living space - clean, durable, and completely intentional.
Epoxy Kitchen Floors for Concrete Slabs and Modern Spaces
For homes built on concrete slabs, epoxy flooring creates a continuous surface that can transform not just the kitchen, but the way the entire space feels. It's especially effective in open floor plans, rental properties, and Airbnbs where durability, easy maintenance, and visual impact all matter.
Most homeowners never think about the concrete beneath their flooring, but for the right home, it's an opportunity.
Stone Coat flooring systems bond directly to concrete, turning the existing slab into a finished floor without the cost and complexity of traditional flooring installation. The result is a durable, easy-to-clean surface that can run seamlessly from the kitchen into adjoining living spaces.
It's one of the most overlooked DIY upgrades in the home and one many homeowners don't realize is even possible.
Key Takeaways
- Countertops, cabinets, islands, and floors have the biggest impact on how a kitchen looks and feels.
- Epoxy and Polyaspartic Countertop Coatings can transform existing surfaces into marble, quartz, soapstone, or completely custom designs without replacement.
- Stone Coat Cabinet and Furniture Paint delivers a durable finish designed for the wear and tear of everyday kitchen use.
- Kitchen islands and bar tops often become the focal point of the room and can be transformed with a combination of epoxy and paint.
- Homes with concrete slab foundations can use epoxy flooring systems to create durable, seamless floors without traditional flooring installation.
- Coordinating multiple surfaces creates a kitchen that feels cohesive, intentional, and professionally designed without the cost of a full remodel.
FAQs
How Much Does a DIY Kitchen Upgrade Cost Compared to a Full Remodel?
A DIY kitchen upgrade typically costs between $2,800 and $15,300, depending on the size of the space and the surfaces being updated. By comparison, a professionally remodeled kitchen often costs $20,000 to $65,000 or more, with high-end renovations exceeding $130,000. Completing the work yourself can significantly reduce labor costs while still delivering a dramatic visual transformation.
Do DIY Kitchen Upgrades Increase Home Value?
Yes. Countertops and cabinets are two of the first features buyers notice when they walk into a kitchen. Updating these surfaces can increase perceived value, improve first impressions, and make the space feel more current without changing the layout. In many cases, surface upgrades deliver some of the strongest returns relative to their cost.
How Long Does a DIY Kitchen Upgrade Take?
Most kitchen surface upgrades can be completed over a weekend. Cabinet painting can take as little as one to two days, including drying time between coats. Countertop epoxy can be poured in a day and is generally ready for light use within 24 hours. APEX Polyaspartic can also be poured in a day, but follows a different cure schedule and is typically ready for light use after approximately 36 to 48 hours, with full cure reached after seven days. A full kitchen refresh that includes cabinets, countertops, and a backsplash is often achievable in two to three days.
What Order Should You Complete DIY Kitchen Upgrades?
Start with the cabinets, then move to the countertops, and finish with the backsplash. Painting cabinets first helps prevent accidental drips or damage to newly finished countertops. The backsplash is typically completed alongside or after the countertop project, with hardware installed as the final step.
Can You Do These Upgrades in a Rental Property?
It depends on the project. Cabinet painting can often be reversed through sanding and repainting if needed. Countertop epoxy and polyaspartic coatings are considered permanent surface coatings and generally require landlord approval before installation. Always check with the property owner before making permanent changes to a rental.